Lego Saturn V Rocket

Picture of reading Lego instructions

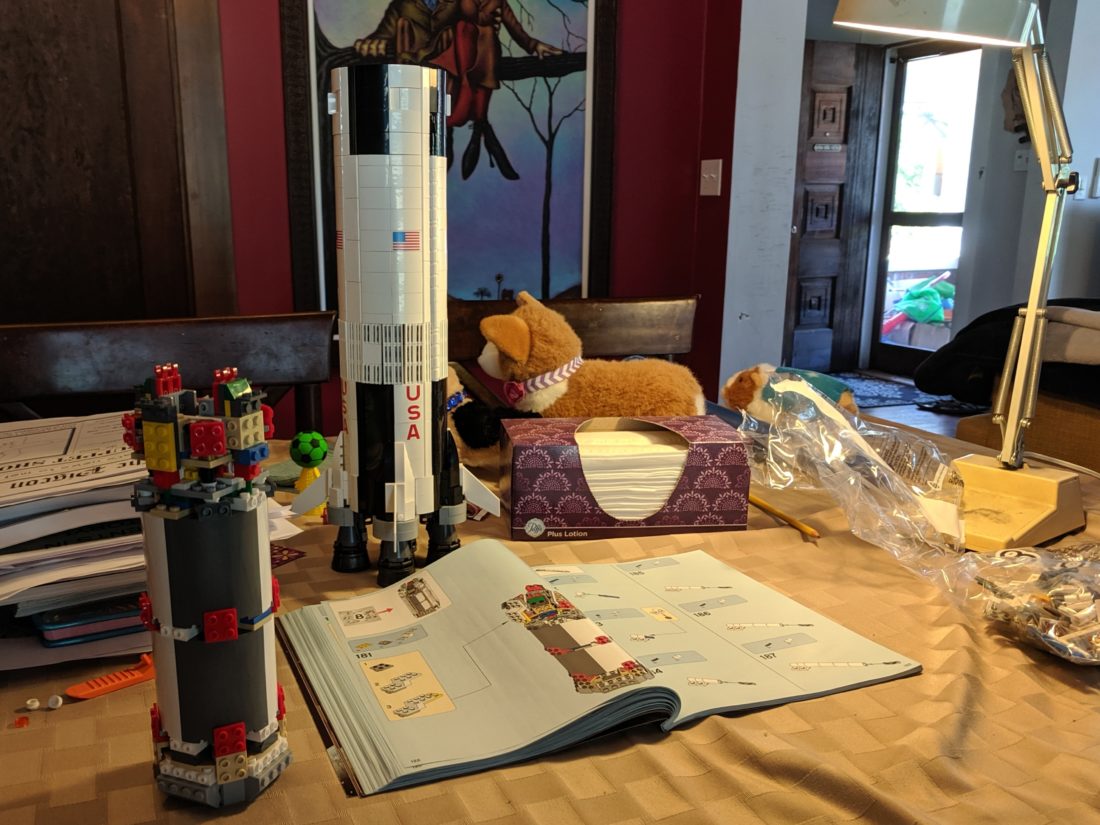
We finished our Lego Saturn V! Just in time to celebrate the 50th anniversary of the moon landing.

I like to pick projects to do with my kids. Sometimes it’s just a puzzle, and other times it has been Lego. This was one of those projects.

You can find a ton of reviews for this set online, and it seems like I am the last person to complete the set. The reviews are true – it’s a great set, well thought out, and very large. You can even add some lights and sound if you want.

Motivating your family

I have found my kids don’t necessarily want to do something if I ask them. Instead, I have had a lot of luck just starting a project in a common room, and they kind of gather on their own. For instance, I’ll start a puzzle and pretty soon someone shows up. They usually start by asking me what I’m doing. They might make fun of it. Soon they start watching. Then they start helping me. Coincidentally, this also works on my significant other 🙂

How to find one

These sets used to be hard to find, but that doesn’t seem to be the case anymore. If you are having a hard time find this set or another set like it, there are some websites that will alert you when a set is back in stock. In hindsight, I probably could have waited longer for a used set to show up online.

If you are looking to save a little money, you might do well to find a used set. For me, I was only interested in the rocket – I did not care too much about the lunar lander and stand. If I would have waited an extra year I could have saved a lot of money. You might do well to find a set that is missing some of these accessories. At least for me, tracking down missing parts can be part of the fun of constructing a set.

Here are some other Lego projects I have worked on:

Lego Solar System

I made a solar system out of Lego!

This post will be a little more detailed. You can see a nice summary album of the process on Imgur: http://imgur.com/a/KqjZK

The final results
I got my inspiration from a mosaic displayed at the European Space Agency in Germany (Pacman Solar System).  It was made by the artist Invader (Invader) .  I borrowed heavily from his design and made some changes along the way.
I liked the 8-bit look of the tiles and had been thinking about starting a project using Lego, so it made a lot of sense.  

Design

I started by making some mock-ups on paper of each planet. I originally thought I would use 4 Lego plates for each tile, but I quickly realized that would make it too large. I switched to using just one 1×1 plate per box.

Building & Learning

We tested our plans on one planet – Earth. I’m always on the lookout for things for my kids to do. It’s more important to be fun than a success. Fun means they might try it again.

I started out by getting a standard plate from Lego, which only came in 2 colors: tan and green.  I thought I would just cover everything outside of the planets in black pieces.  This idea was quickly dropped after I realized how much money I would have to spend on black background pieces.  After finishing the first planet (Earth), I found some black base plates on ebay.


Goodbye tan baseplate, hello black baseplate

After the first two were done, we got into a rhythm and pushed out the rest in quick order.  I wasn’t planning on making the sun, but I accidentally ordered too many baseplates and figured why not.

Keep an eye on Uranus’ rings

Assembly

I mounted the plates to a 1/4 inch piece of wood that is 6 feet long.  I painted it black and attached each plate using liquid nails adhesive.


Extra Credit

I decided to try to add some additional fun themes to my solar system. I played around with making some things using my extra pieces, but I couldn’t get them to look quite right.

I was trying to find a way to make a convincing Starship Enterprise when it occurred to me that my strategy suggested two-dimensional thinking. That’s when I found lots of instructions and small sets on ebay – a TARDIS, X-wing, TIE Fighter, etc.

My first attempt, any guesses as to what some of these are?


Final Result

After I had pretty much finished, a friend pointed out that Uranus’ rings we situated more North-to-South. One advantage of using Lego is that you can change things fairly easily.

This project cost me about $300:

  • $200 – Legos
  • $60 – Baseplates
  • $30 – wood
  • $10 – glue, picture hangers, etc

I spent a lot of time on various Lego websites, but I almost always used ebay for my final purchases.  The people running little Lego shops on there are very organized and ship fast.  I made one order on Lego’s Pick-A-Brick website and I’m still waiting for those parts to arrive.